

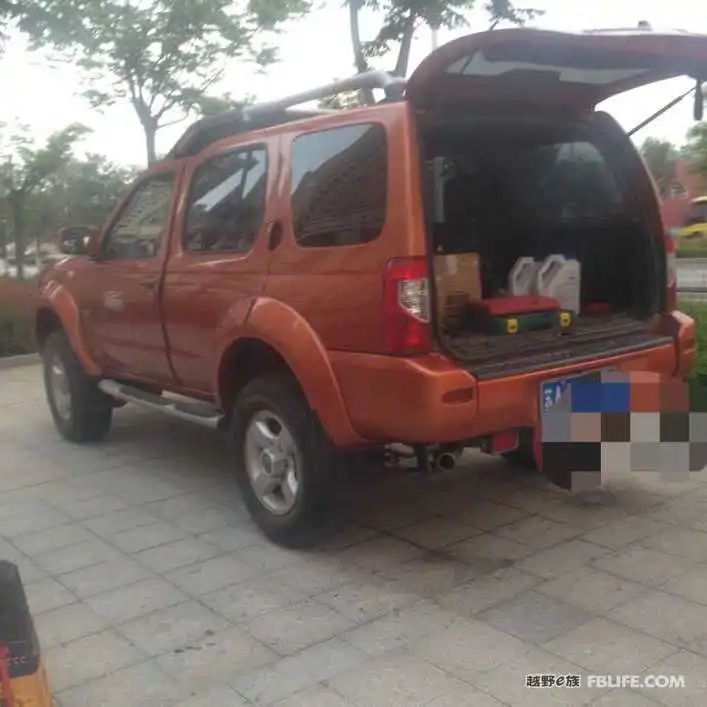
The spring is warm and the flowers are blooming, and the epidemic has dissipated. After experiencing this epidemic, everyone feels the true meaning of health and freedom even more. After the city is unblocked.
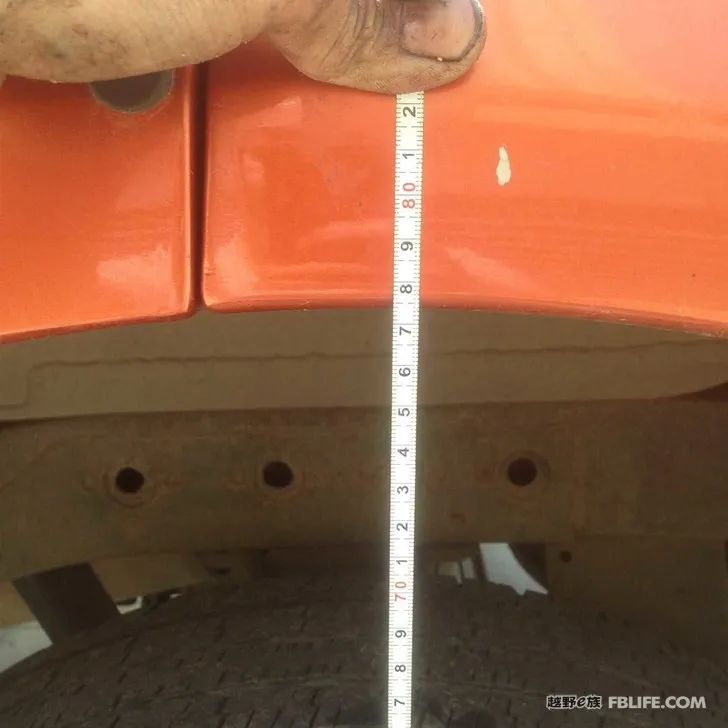
The reason for the increase is that, compared with everyone else, I realized that the height of my car has shrunk seriously (front left 69, front right 67.5, rear left 69.5, rear right 69), and the second is that the epidemic at the beginning of this year gave myself enough time to Studying and researching, the third is that people are cheap and like to mess around. The success of this tossing is inseparable from the knowledge accumulation and sharing of the predecessors. Here I summarize the ascension process and precautions into homework, and recommend everyone to upgrade the car by themselves.
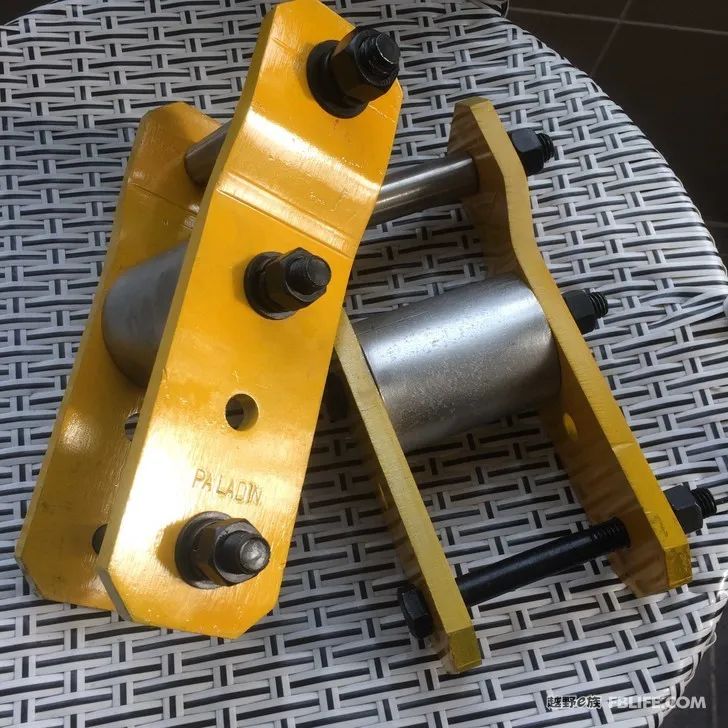
First of all, let me talk about the elevated kit that I processed and made:
1. A pair of two-inch adjustable lifting lugs (adjustable original factory, one-inch, two-inch three heights);
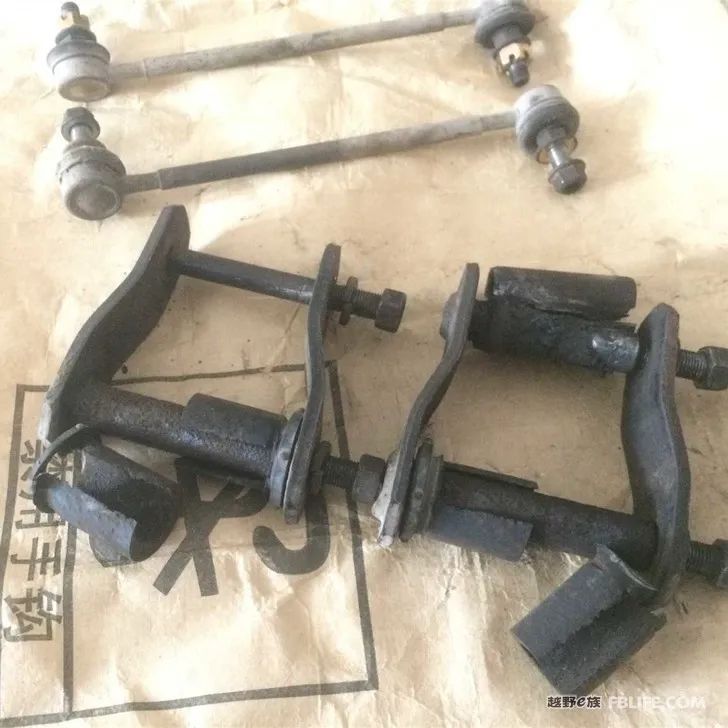
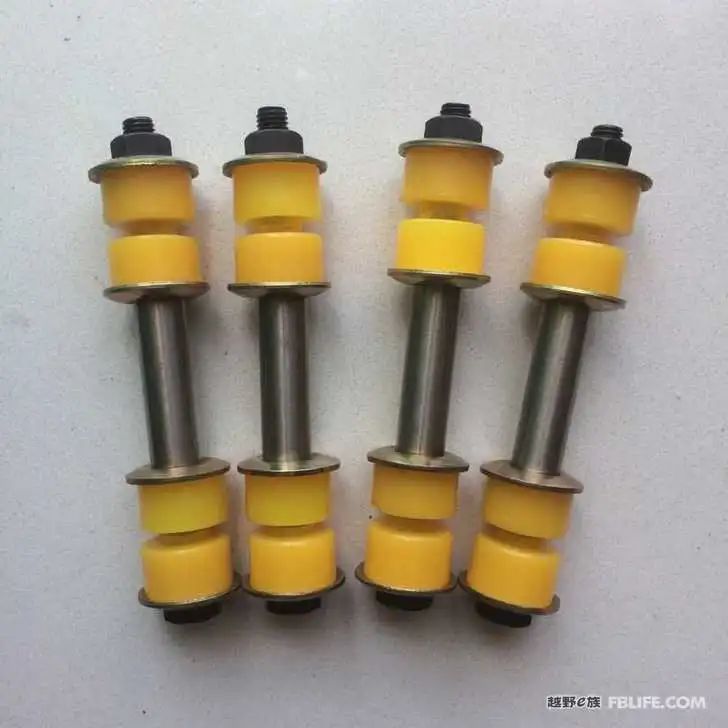
2. A pair of height-adjustable ball head poles for the rear balance bar
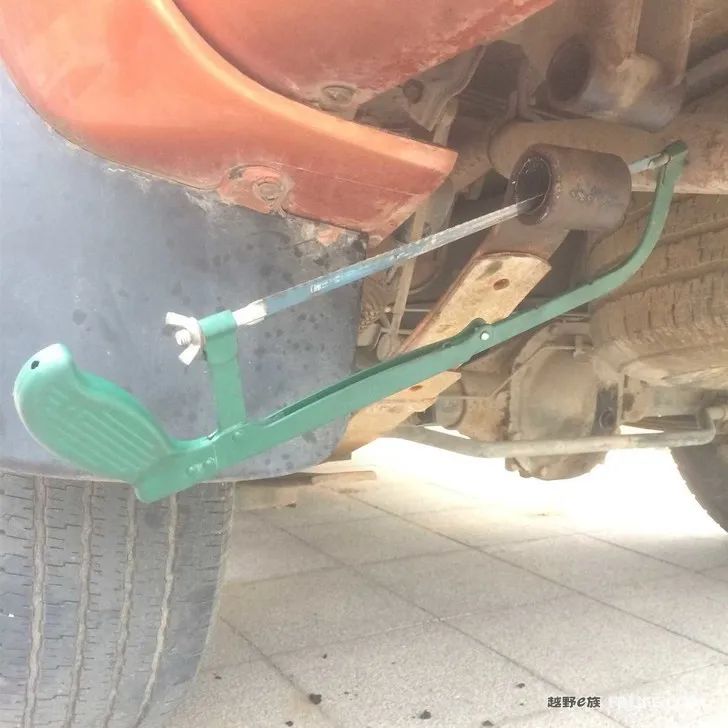
3. The front balance bar is strengthened and improved to raise a pair of uprights;
4. Rubber sleeves for steel plate lugs.
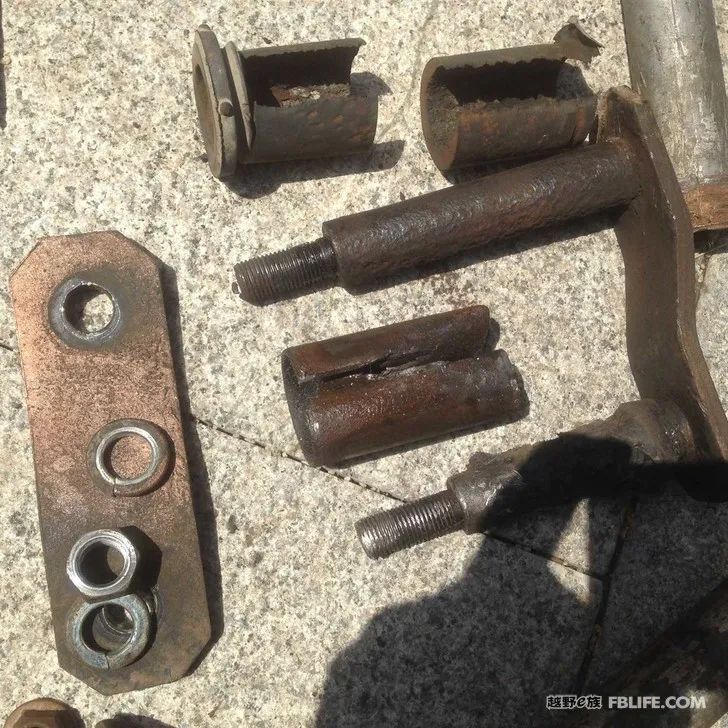
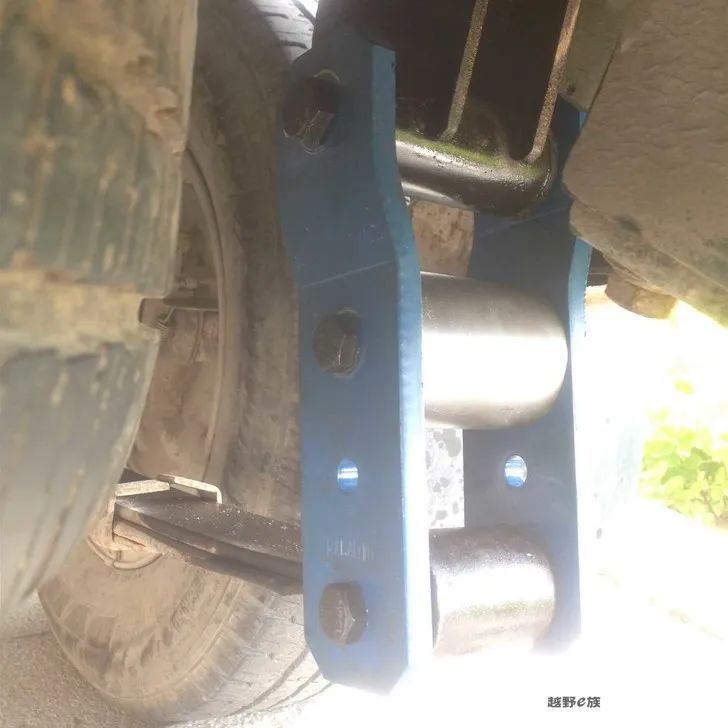
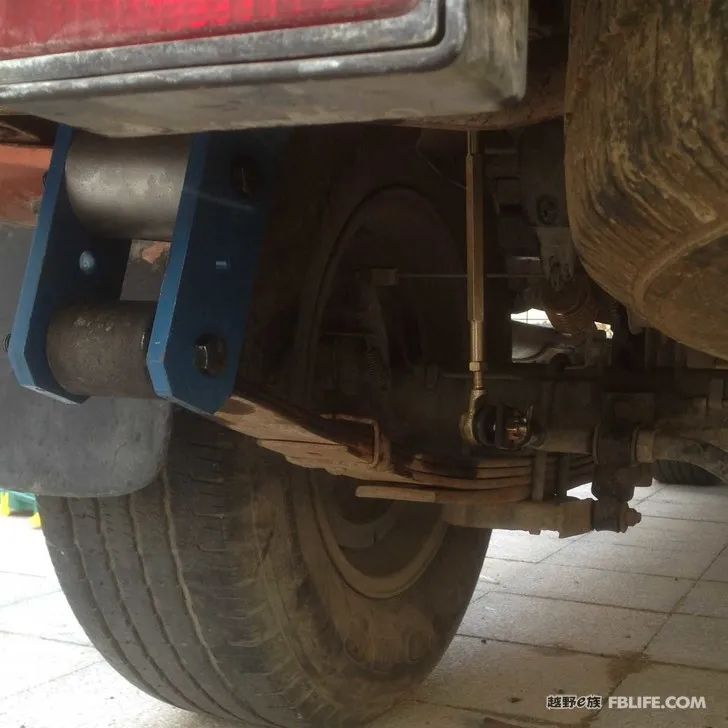
⑴The production of lifting lugs refers to a large number of cases and technical materials of riders, and compares the lifting lugs sold in the market. Hope for the best strength and quality. Finally, the lifting lug is made of 16MN (Q345b low-alloy steel plate), which is cut and opened by laser blanking, and formed by cold pressing. The thickness is 10mm, the width is 60mm, the length is 220mm-two inches (265mm-three inches), the sleeve material is 304 stainless steel pipe, the screw is 10.9 high-strength screw, and the weight of the whole set of lifting lugs reaches more than 10 kg.
⑵The rear balance bar adopts a two-way adjustable type, with a minimum height of 28cm and a maximum height of 33cm. It is convenient and practical to adjust the height of the pole according to the needs.
⑶ The front stabilizer pole has been disassembled and adjusted many times, and finally the height, strength and rubber sleeve have been improved. Personally, I think height adjustment is still necessary, because after the front wheel is raised, the front balance pole will pass through the screw hole. The position relative to the lower swing arm changes, and the torsion bar is tightened directly without changing the height. The torsion bar is in a distorted state. The visual effect is that the rubber sleeve is unevenly stressed, squeezed and deformed, and the serious screw rod directly contacts the fixing seat. rubbed off. Another important point is that the protruding polyurethane rubber sleeve that is different from the original factory has been replaced. The positive part of the protruding part can be moved into the middle of the screw and the hole of the fixing seat to prevent direct friction between the screw and the hole and the torsion bar during the movement, effectively preventing The hollow friction of the fixed seat becomes larger. Improve comfort and reduce noise.
⑷The rubber sleeve of the steel plate lug, this is a consumable item, almost all the rubber sleeves will wear out after driving for a few years, so it is right to replace it by the way. During the disassembly and assembly process, it was found that the quality of the rubber sleeve with steel ring under the lifting lug designed by the original factory is very good, the upper rubber sleeve has been completely polished, and a dent has been ground on the screw and the pipe wall. Because the end of the steel plate is an unclosed curled tube, the steel ring rubber sleeve can evenly distribute the force of the screws under the lifting lug, which is actually a very strong protection for the bow plate spring. Therefore, I personally think that the rubber sleeve behind the lug should still use the original design, and do not replace it with a pure rubber rubber sleeve.
Let’s start talking about my own personal ascent process.
1. It is recommended to remove or loosen the two rear stabilizer poles before operation;
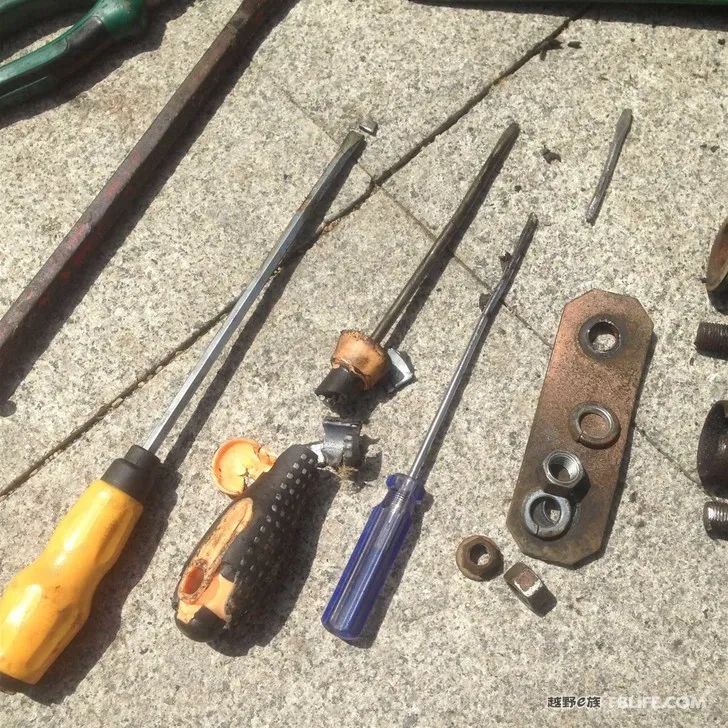
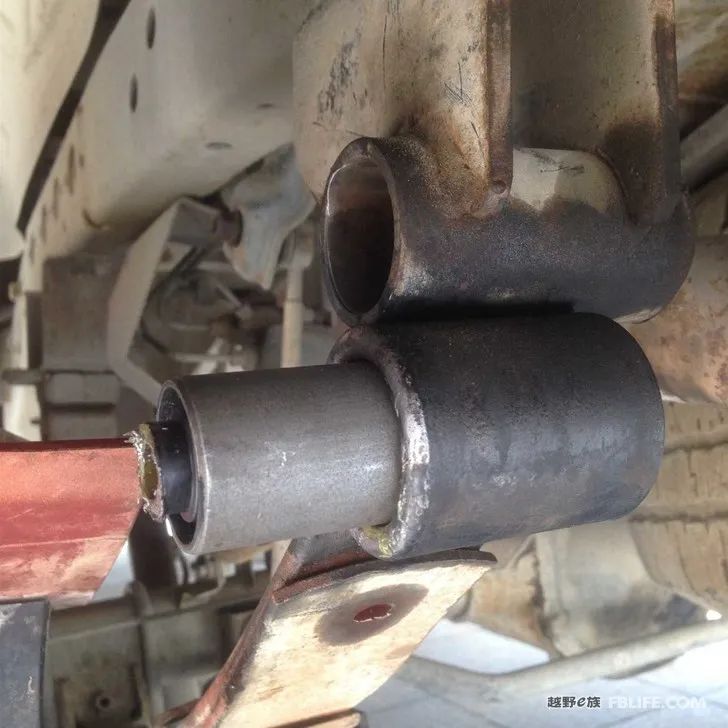
2. Remove the lifting lug of the original car; then lift up the side to be removed with the jack first, and the jack is in a suitable position. I am standing in the middle of the longitudinal beam. I can’t lift the steel plate and the rear axle, because the purpose is to make the lifting lug Depressurize until there is no pressure to remove the lug easily. The jack is raised slowly, and the buttocks of the car are slowly raised until the lifting lug is almost vertical to the ground and the wheels are not suspended. At this time, you can safely and boldly remove the two screws. If you are lucky, the screws will loosen, and the lifting lug can be pulled out with a few clicks of the remote control, and the rear beam and the steel plate are successfully separated. (Unfortunately, the lug screws are severely corroded, and if they cannot be separated, they will be ground slowly).
3. Grinding and derusting the mounting holes of the lifting lugs. This process can be said to be necessary, because Paladin’s lug sleeves have not been designed with oil nozzles, so it is inevitable that this place will rust according to experience, mainly due to the difference in the degree of rust. Sand the inner wall to make it smooth, clean it, and apply grease.
4. Install lifting lugs (the most important thing). Many people say that this process is impossible for one person to complete, but through experiments, as long as you use your brain a little, it is still very easy for one person to complete it. Recommended method: Use another jack (preferably smaller) with one steel plate lug hole on the head and one head beam lug hole. At this time, a steel pipe or wood is needed to pry it, because the relative position of the two mounting holes is not enough. If the jack and lifting lugs are put down, the steel plate needs to be opened for a large distance before installation.
5. Put on the lug screws and sleeves, and tighten the screws. Installed. Do the same for the lifting lug on the other side.
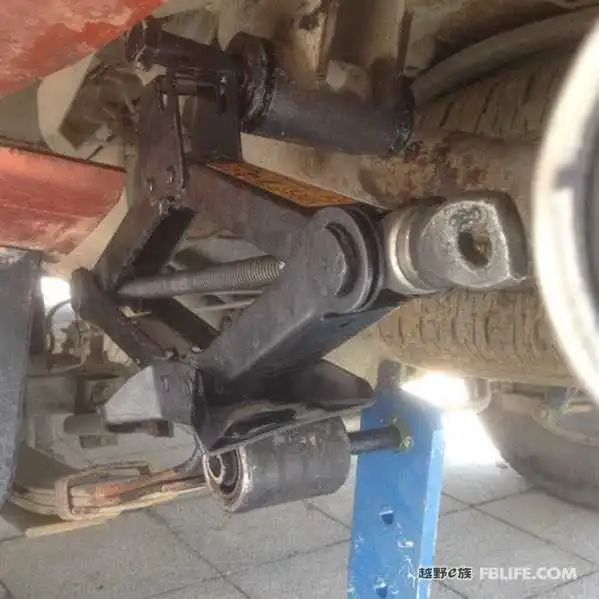
6. After installation, the balance bar can be adjusted upright. After the replacement of the two lifting lugs, measure and record the actual height of the left and right rear wheels, and then install and adjust the height of the left and right stabilizer bars according to the data. Just adjust the pole to a height of 77-72=5 cm, that is, to a height of 31 cm.
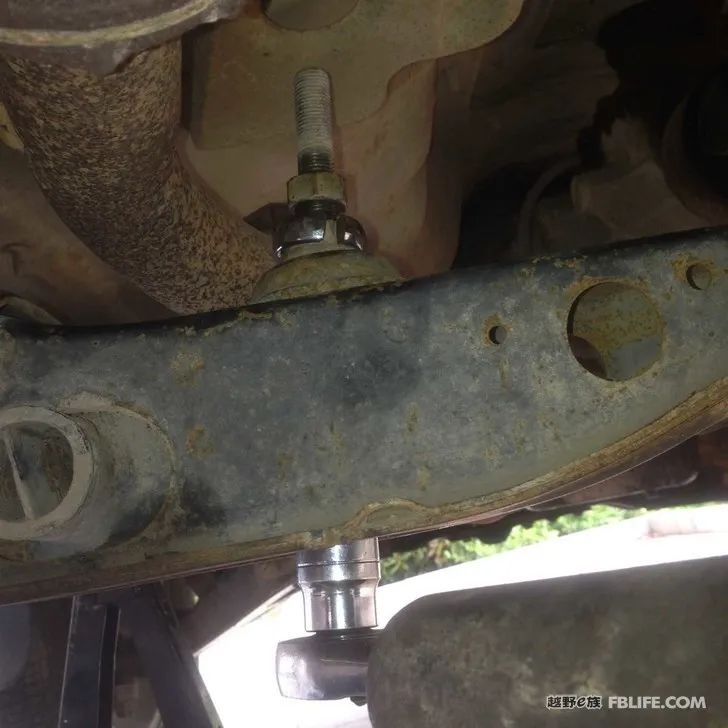
7. Adjust the torsion bar to adjust the front wheel height. The height of the front wheels can only be adjusted accurately after the rear wheels are adjusted, because the heights of the four wheels affect each other. It is more reasonable to adjust the front wheel not to exceed the height of the rear wheel. My rear wheel is 77.1cm, and the front wheel is also adjusted to 77.1. Or a lower point is conducive to body stability. Torsion bar adjustment is also very simple. First jack up the tire on the side to be adjusted, the tire is suspended in the air, drill into the bottom of the car, the two screws on the top, loosen the No. 22 torx or opening of the loosening screw on the top, and then adjust the No. 21 sleeve of the bottom screw. Tighten it clockwise to adjust it up, and loosen it counterclockwise to adjust it down. According to experience, screwing the screw 3 times can increase the height by about 2 cm, and so on, I know it well. At the same time, pay attention to whether there is enough adjustment space for the adjustment screw of the torsion bar. If the adjustment screw is screwed to the end, the torsion bar at one end of the swing arm must be dismantled and adjusted again.
8. Install the two small poles of the front balance bar, and the whole lifting process is completed.


[The content comes from the off-road e family community]
Author: Golden Snake Lang Lang
Link: http://bbs.ucar.run/thread_14758426_1_1.html